Key Takeaways
- Blind bake a 9-inch pie crust at 375°F for 20 minutes total, cooling completely before filling with chocolate custard.
- Melt 5 oz semi-sweet chocolate using a double boiler, maintaining 115–120°F to prevent seizing or texture degradation.
- Whisk tempered chocolate with heavy cream at 85–90°F using figure-eight technique for smooth, consistent filling consistency.
- Refrigerate assembled pie minimum 4 hours, preferably overnight, to ensure proper set and optimal flavor development.
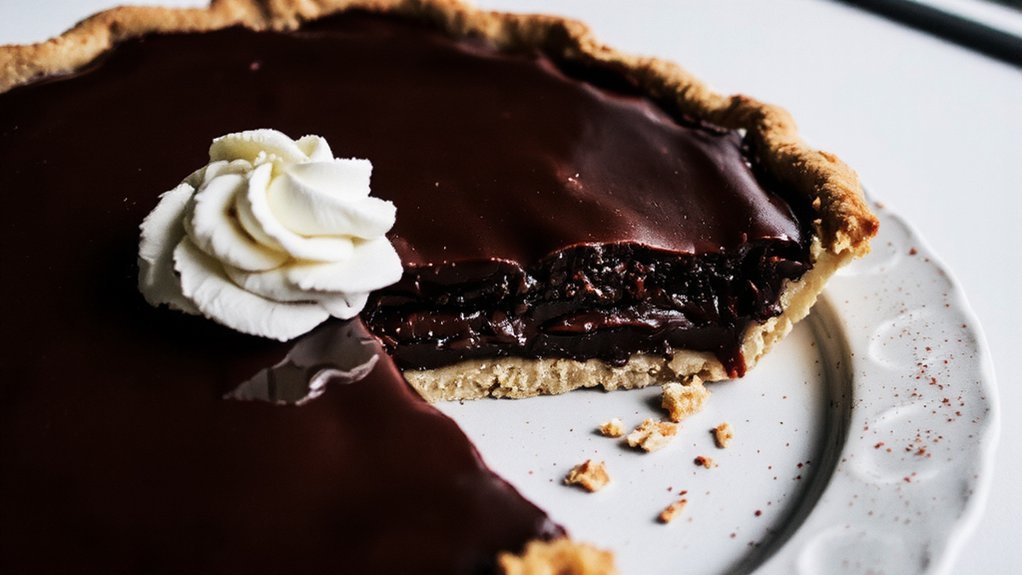
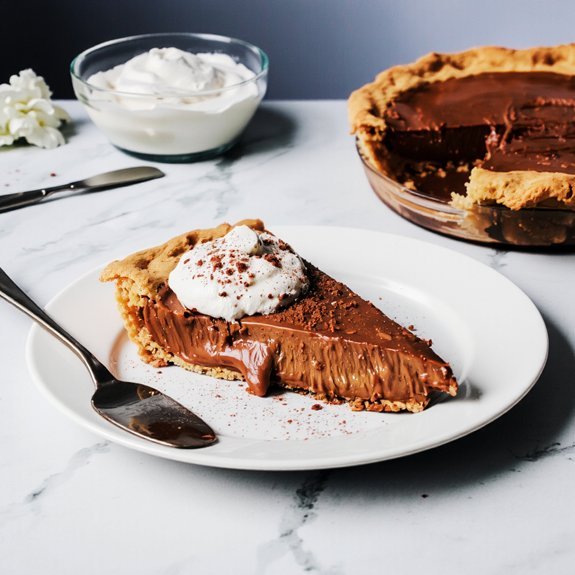
- Cut with a hot, damp knife between slices; serve on chilled plates with whipped cream topping and cocoa powder.
Ingredients You’ll Need

You’ll need several key components to construct this dessert: a 9-inch pie crust (store-bought or homemade),
2 cups whole milk,
5 ounces semi-sweet chocolate (chopped),
3 tablespoons cornstarch,
2 tablespoons unsweetened cocoa powder,
¼ teaspoon salt,
⅓ cup granulated sugar,
3 egg yolks,
2 tablespoons unsalted butter,
1 teaspoon vanilla extract,
and 1 cup heavy whipping cream with 2 tablespoons powdered sugar for the topping layer.
When sourcing ingredients, select quality components from reputable suppliers.
For allergen substitutions, you can replace whole milk with almond or oat milk alternatives and swap egg yolks with cornstarch slurry.
Replace whole milk with almond or oat milk alternatives and swap egg yolks with cornstarch slurry for allergen-friendly baking.
Dairy-free butter works effectively for those avoiding animal products.
Dark chocolate chips substitute for semi-sweet varieties if you prefer deeper flavor profiles.
Make sure all substitutions maintain proper ratios to preserve structural integrity and texture consistency throughout the custard filling and final composition.
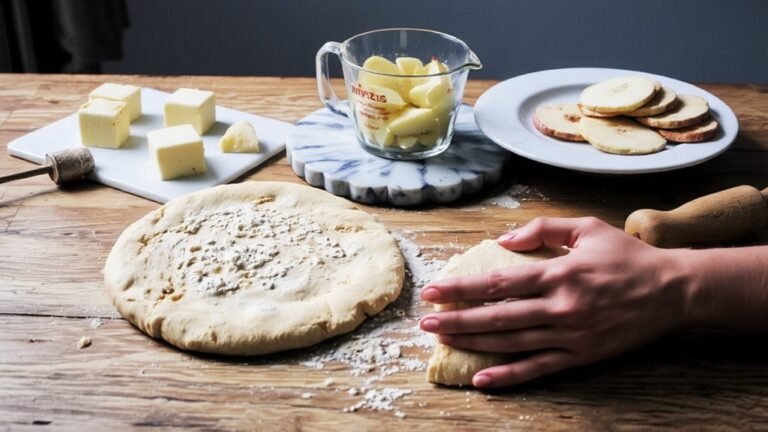
3. Preparing the Buttery Crust
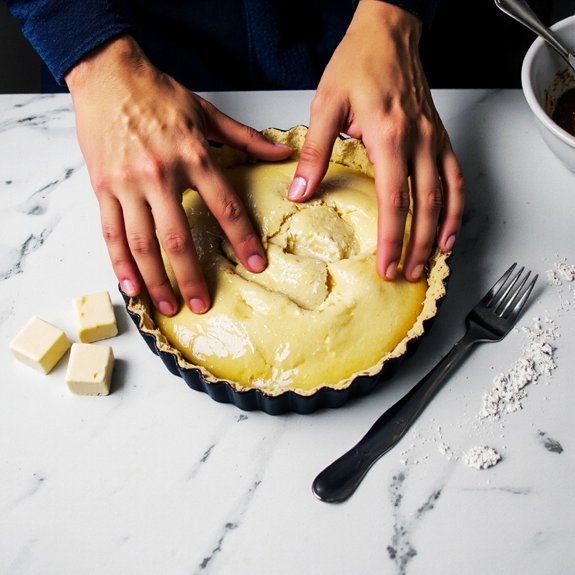
Starting with a quality pie crust—whether store-bought or homemade—establishes the structural foundation for your chocolate cream pie. You’ll press the dough into your 9-inch pie pan, guaranteeing even coverage across the bottom and sides. After dough resting for 15 minutes, you’ll perform edge crimping using your thumb and forefinger to create a decorative seal that prevents shrinkage during baking.
| Step | Temperature | Duration |
|---|---|---|
| Blind Bake | 375°F | 12 minutes |
| Full Bake | 375°F | 8 minutes |
| Cool | Room Temp | 30 minutes |
You’ll blind bake your crust with parchment and weights to maintain structural integrity. Remove weights and finish baking until golden. This pre-baking technique prevents a soggy crust when you add your chocolate filling. Cool completely before proceeding—this critical step guarantees your pie sets properly and delivers the freedom to slice cleanly.
4. Making the Silky Chocolate Filling
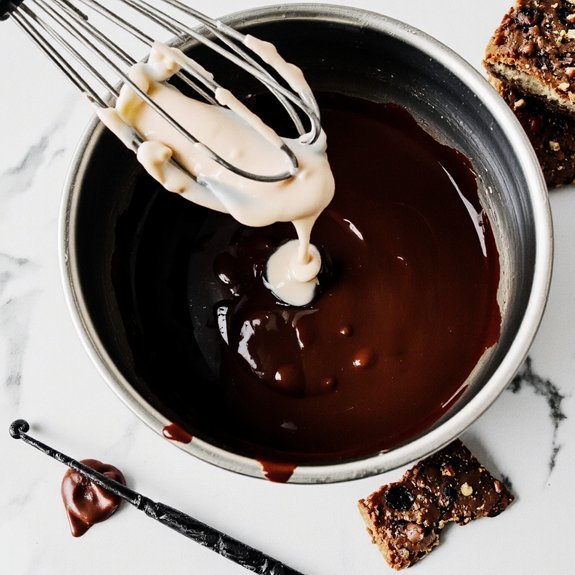
You’ll start by melting your chocolate using a double boiler method, maintaining temperatures between 115-120°F to prevent seizing and guarantee smooth incorporation.
Next, you’ll temper your mixture by gradually whisking in room-temperature ingredients, which stabilizes the cocoa butter crystals and creates that signature silky texture.
Finally, you’ll adjust your consistency by modulating heat and carefully measuring your cream ratios until you achieve the ideal viscosity for pouring and setting.
Melting Chocolate Properly
To achieve a smooth, silky chocolate filling, proper melting technique is essential—use a double boiler or microwave method to maintain precise temperature control between 115–120°F (46–49°C) for dark chocolate and 110–115°F (43–46°C) for milk or white chocolate.
For utensil selection, choose heatproof bowls that fit snugly over simmering water without touching it. Stir constantly with a silicone spatula to distribute heat evenly. If microwaving, use 30-second intervals at 50% power, stirring between sessions.
Avoid overheating, which causes seizing—a grainy, broken texture that ruins your filling. Never allow water to contact your chocolate.
For cleanup tips, wipe utensils immediately with dry cloths before chocolate hardens. Soak remaining residue in hot water. This prevents stubborn buildup and streamlines your post-baking process.
Tempering Your Mixture
Once your chocolate reaches the target temperature, the tempering process begins by introducing a cooling phase that stabilizes the cocoa butter crystals—this critical step prevents bloom and guarantees a glossy, snappy finish.
You’ll need reliable equipment choices: a calibrated thermometer and marble slab or silicone mat for precise temperature control. Seed your melted chocolate with chopped tempered chocolate, maintaining constant agitation until you achieve 82°F for dark chocolate.
Safety precautions matter here—avoid overheating, which destroys crystal structure. Work methodically, keeping your workspace cool.
Once you’ve stabilized the mixture, you’re ready to fold in whipped cream and construct your pie. This tempered base makes certain your filling sets properly, delivering that luxurious, snap-and-melt texture that distinguishes exceptional chocolate cream pie from mediocre versions.
Achieving Perfect Consistency
With your tempered chocolate base stabilized at the proper temperature, it’s now time to transform it into a luxuriously silky filling through precise hydration and aeration techniques.
Add heavy cream incrementally to your chocolate, whisking continuously using a figure-eight whisk technique.
This method incorporates air while maintaining emulsion stability.
Perform viscosity testing by lifting your whisk—the mixture should coat evenly without clumping or streaming excessively.
Control your consistency by adjusting cream ratios carefully.
For ideal results, aim for a flow rate that holds shape briefly before settling.
The filling shouldn’t be overly thick or runny; precision here determines your pie’s final texture.
Temperature matters—keep everything between 85-90°F to prevent seizing.
Your filling’s success depends on this methodical approach, rewarding you with that coveted silky mouthfeel.
5. Assembling Your Pie
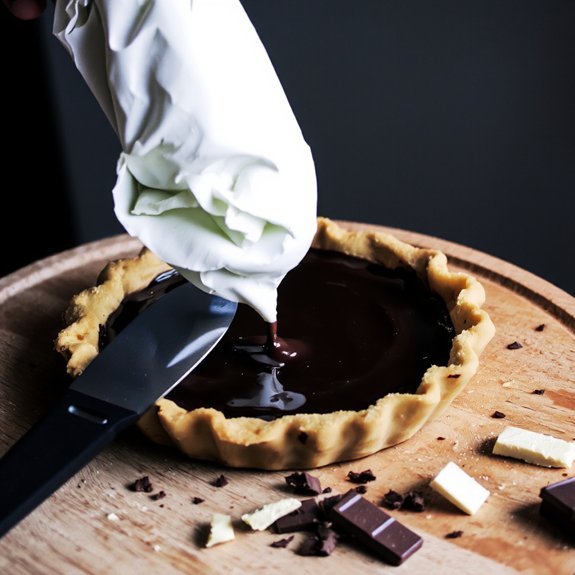
Layering your components in the correct sequence guarantees a structurally sound chocolate cream pie.
You’ll position your pre-baked crust as the foundation, then pour the chocolate custard filling to a depth of approximately one inch from the rim.
Once the filling sets for two hours at 40°F, you’ll apply the whipped cream topping using a offset spatula for visual symmetry.
Your tool selection determines application precision—choose a bench scraper for clean edges and a piping bag for decorative flourishes if desired.
Chill the assembled pie for an additional hour before serving.
This final resting period allows flavors to meld while maintaining structural integrity.
You’ve achieved a professional-grade dessert through methodical assembly and proper temperature control.
6. Chilling and Serving Tips
You’ll need to refrigerate your chocolate cream pie for a minimum of 4 hours, though overnight chilling promotes ideal set and flavor development.
When serving, use a sharp knife dipped in hot water between each slice to achieve clean cuts and maintain the pie’s structural integrity.
Store any remaining pie covered in the refrigerator for up to 3 days, or freeze individual slices in airtight containers for up to 2 months.
Optimal Refrigeration Time
Once you’ve assembled your chocolate cream pie, refrigeration becomes critical to achieving the proper texture and structural integrity.
You’ll want to chill your pie for a minimum of four hours, though overnight refrigeration yields best results.
This timeframe allows thermal modeling of your filling to stabilize completely, ensuring a firm yet creamy consistency when sliced.
For efficient kitchen workflow, prepare your pie in the morning for evening service, or assemble it the night before.
You shouldn’t exceed 48 hours of refrigeration, as the crust gradually absorbs moisture and loses its structural integrity.
Store your pie at 40°F or below in an airtight container to prevent flavor contamination and oxidation.
You’re free to serve directly from the refrigerator—this maintains the ideal texture without additional tempering required.
Serving and Storage Techniques
Proper chilling establishes the foundation for serving your chocolate cream pie effectively.
You’ll achieve ideal results by cutting 3-inch portions using a sharp, heated knife—dipping it in hot water between each slice guarantees clean edges without crumb displacement.
Your plating technique matters considerably. You’ll position each slice slightly off-center on chilled dessert plates, allowing chocolate ganache to showcase its glossy finish.
Add complementary garnishes like cocoa powder or chocolate shavings for visual contrast.
For storage, you’ll keep leftover pie refrigerated at 40°F in an airtight container for up to four days.
Protect the chocolate cream layer with plastic wrap to prevent moisture absorption and surface degradation. Don’t freeze—the custard’s texture deteriorates considerably, compromising your carefully crafted dessert’s integrity.
7. Storage and Make-Ahead Advice
Because chocolate cream pie’s components require different preservation methods, it’s essential to store each element separately. You’ll maximize shelf life and maintain structural integrity by following these protocols.
Refrigerate your baked crust in an airtight container for up to three days. The chocolate custard filling stays fresh for two days when stored at 40°F or below in a sealed vessel.
Whipped cream topping should be applied within two hours of serving to prevent degradation.
For travel packaging and extended storage, you can prepare components individually days ahead:
- Freeze the pie crust up to two weeks in advance
- Make custard filling and refrigerate with labeling dates for easy tracking
- Whip cream fresh on serving day for ideal texture
This modular approach gives you flexibility while preserving quality.
Frequently Asked Questions
Can I Use a Pre-Made Graham Cracker Crust Instead of Making One From Scratch?
You’ll absolutely save time with a pre-made graham cracker crust—that’s the primary convenience tradeoff.
However, you’re sacrificing texture control; commercial versions often contain more binding agents, yielding a denser, less crispy foundation.
You can mitigate this by lightly toasting your crust at 350°F for 3-5 minutes before filling.
This thermal methodology restores structural integrity and crispness.
The choice grants you freedom: optimize for speed or customize your textural specifications.
What’s the Best Chocolate Type to Use for the Richest Flavor?
You’ll want to select single origin chocolate with 70-85% cocoa percentages for ideal richness.
Dark chocolates from Ecuador or Madagascar deliver complex flavor profiles without excessive bitterness.
Measure precisely—use 6 ounces of your chosen chocolate, chopped uniformly for consistent melting.
Temper your selection at 45-50°C to achieve silky texture.
This methodology guarantees you’re not compromised by inferior commercial blends, giving you complete control over your dessert’s sophisticated depth.
How Can I Fix a Filling That Turned Out Too Thick or Thin?
You’ve got options for both directions.
If your filling’s too thin, you’ll add thickening methods: whisk in cornstarch slurry, increase egg yolks, or reduce heat exposure time.
For overly thick consistency, employ thinning techniques by gradually incorporating whole milk or cream while whisking constantly.
You’re in control—adjust incrementally, reheating gently if needed, until you’re hitting that ideal pudding-like viscosity that’ll satisfy your palate perfectly.
Can I Make This Pie Without Eggs for Dietary Restrictions?
You can absolutely create an egg-free chocolate cream pie.
Replace eggs with aquafaba (3 tablespoons per egg) or commercial egg replacer for binding.
Use vegan thickeners like cornstarch or arrowroot powder at a 1:1 ratio.
Incorporate dairy substitutions including coconut cream, oat milk, or cashew cream for richness.
You’ll maintain structural integrity and achieve that decadent chocolate texture you’re after while respecting your dietary freedom.
Why Did My Chocolate Filling Crack or Separate After Baking?
Your chocolate filling cracked or separated due to temperature shock during cooling. You’ve likely cooled it too rapidly, causing uneven contraction.
Instead, you’re in control—implement gradual cooling at room temperature first, then refrigerate slowly for ideal results. Use precise temperature regulation between 160-180°F during preparation and avoid sudden temperature fluctuations.
This technical methodology prevents structural breakdown and maintains your filling’s integrity.


Leave a Comment