Key Takeaways
- Combine melted butter and cocoa powder, then fold into emulsified eggs and sugar; mix flour minimally to avoid developing gluten structure.
- Beat room-temperature cream cheese with sugar until fluffy, then incorporate eggs individually, vanilla, salt, and sour cream without overmixing.
- Pour cheesecake mixture directly onto brownie base and bake at 325°F for 45–50 minutes until the center shows slight jiggle.
- Cool completely at room temperature for 30 minutes, then refrigerate minimum 4–6 hours in an airtight container for proper setting.
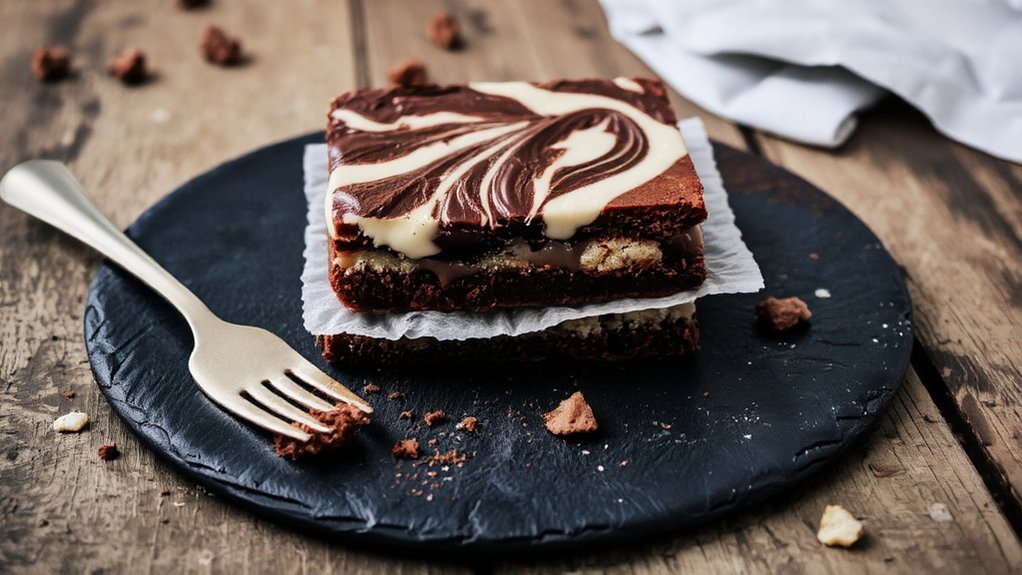
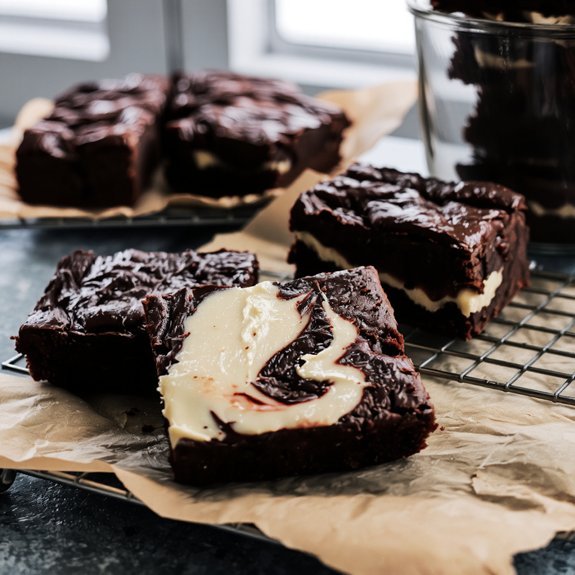
- Serve at varied temperatures—warm brownie with chilled cheesecake creates textural contrast; garnish with cocoa powder, edible flowers, or candied citrus.
Ingredients You’ll Need
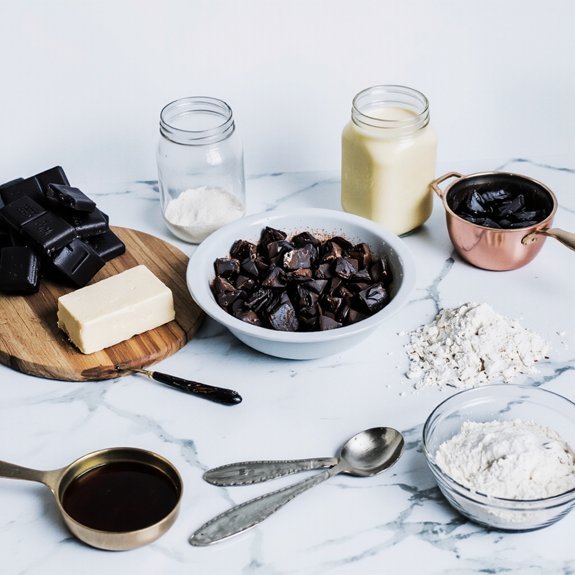
You’ll need several key components to craft this dessert: 1 cup all-purpose flour, ½ cup unsweetened cocoa powder, ¾ teaspoon baking soda, ¼ teaspoon salt, ½ cup unsalted butter, 1¼ cups granulated sugar, 2 large eggs, 1 teaspoon vanilla extract, 8 ounces cream cheese (softened), ¼ cup sour cream, and ⅓ cup cheesecake filling (or sweetened cream cheese mixture).
These pantry staples form your foundation.
When sourcing ingredients, examine ingredient labels carefully to guarantee quality and purity.
Select unsweetened cocoa powder without additives for ideal chocolate flavor intensity.
Your cream cheese must reach room temperature for seamless incorporation.
Verify butter remains unsalted to control sodium levels precisely.
Fresh eggs and pure vanilla extract greatly enhance your final product’s complexity and depth, delivering the sophisticated flavor profile you’re seeking.
Preparing the Brownie Base
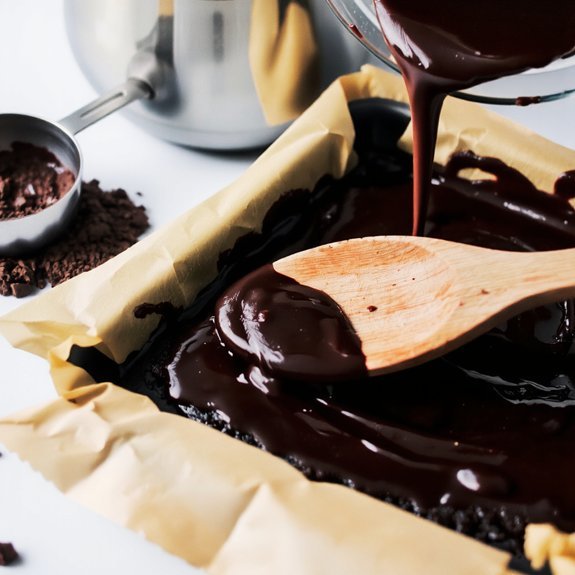
With your ingredients assembled and measured, you’re ready to construct the foundation of this decadent dessert.
Begin by melting your butter and chocolate together using a double boiler, maintaining a temperature below 120°F to preserve the chocolate’s integrity.
Melt butter and chocolate together using a double boiler, maintaining temperatures below 120°F to preserve chocolate’s integrity.
Once melted, remove from heat and whisk in your cocoa powder until fully incorporated.
In a separate bowl, combine eggs and sugar, employing a vigorous mixing technique to achieve ideal emulsification.
This guarantees proper texture optimization and creates a dense, fudgy crumb structure.
Fold your chocolate mixture into the egg mixture using deliberate, controlled motions—avoid overmixing, which develops gluten and compromises your brownie’s tender quality.
Stir in flour and salt with precision, mixing only until flour disappears.
Pour your batter into your prepared pan, creating an even layer that’ll support your cheesecake topping.
Making the Cheesecake Topping
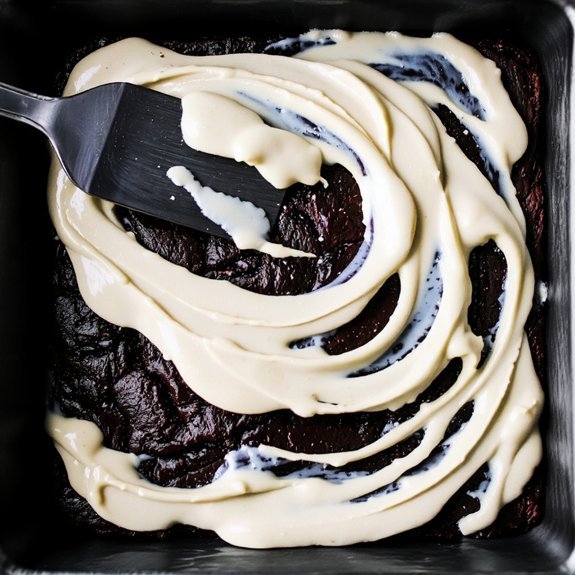
Once your brownie batter’s settled in the pan, it’s time to craft the creamy layer that’ll elevate this dessert.
You’ll need to beat softened cream cheese until completely smooth, preventing curdling by maintaining room temperature ingredients throughout. Here’s your process:
- Combine 16 oz cream cheese with ¾ cup granulated sugar
- Beat on medium speed for 3 minutes until pale and fluffy
- Incorporate 2 large eggs individually, mixing 30 seconds between additions
- Fold in 1 tsp vanilla extract and ¼ tsp salt
For texture troubleshooting, make sure your mixer doesn’t overheat the mixture—this causes density issues. Pour this topping directly onto your brownie base without delay. The cheesecake layer’ll bake alongside your brownie foundation, creating the perfect contrast between dense chocolate and creamy tang. Your freedom to customize lies in adjusting sweetness levels to your preference.
Assembling and Baking
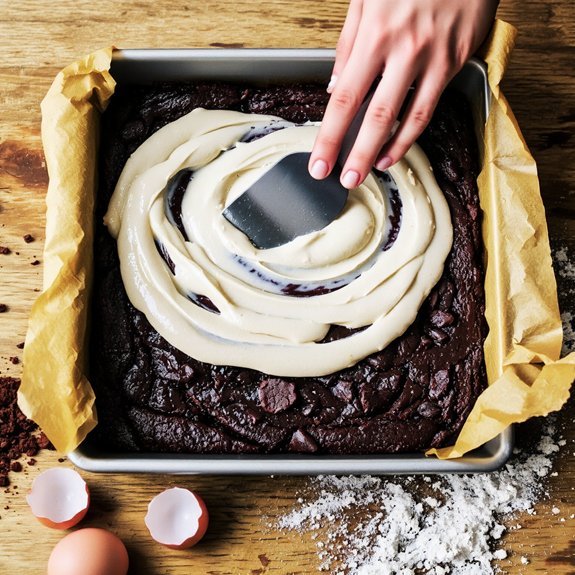
After spreading the brownie batter evenly across your prepared pan, carefully pour the cheesecake mixture over the chocolate base, allowing it to settle naturally without overworking the layers. Layer adhesion occurs most effectively when both components reach similar temperatures. Place your assembly into a preheated oven calibrated to 325°F.
| Parameter | Specification |
|---|---|
| Temperature | 325°F |
| Duration | 45-50 minutes |
| Doneness | Slight jiggle at center |
Bake until the cheesecake layer sets while maintaining minimal movement at its core. The brownie base continues cooking beneath, developing structural integrity through Maillard reactions. Avoid opening the oven door during the initial 40 minutes—thermal fluctuations compromise layer adhesion and create cracks. Remove when the cheesecake exhibits gentle surface wobble, indicating proper custard consistency. Cool completely before refrigerating for minimum six hours, enabling molecular stabilization and ideal slice definition.
Cooling and Storage Tips
You’ll cool your cheesecake brownies at room temperature for 30 minutes before transferring them to a 4°C refrigerator for a minimum of 4 hours, which allows the layers to set properly and develop ideal texture.
For long-term storage, you can refrigerate them in an airtight container for up to 5 days or freeze them in parchment-separated layers within a freezer bag for up to 3 months.
When you’re ready to serve frozen brownies, thaw them in the refrigerator for 2-3 hours rather than at room temperature to maintain structural integrity.
Proper Cooling Process
As the cheesecake brownie emerges from the oven, it’ll require a staged cooling approach to set the structure without inducing thermal shock.
- Allow the dessert to rest at room temperature for 30 minutes, enabling initial crust formation and structural stabilization
- Transfer to your refrigerator for a minimum of 4 hours, facilitating complete protein denaturation and moisture redistribution
- Implement condensation control by placing parchment paper between the dessert and any covering, preventing unwanted moisture accumulation
- Remove from refrigeration 15 minutes before serving to optimize texture and flavor profile development
This methodical cooling regimen guarantees your cheesecake brownie achieves ideal density and texture.
You’ll preserve the delicate balance between fudgy brownie layers and creamy cheesecake filling.
Rushing this process compromises structural integrity, resulting in cracking or separation.
Proper temperature management grants you the freedom to confidently present a professional-quality dessert.
Long-Term Storage Methods
Storing your cheesecake brownie properly extends its shelf life while maintaining the integrity of both layers.
You’ll achieve ideal preservation by employing vacuum sealing, which removes oxygen and prevents oxidation and freezer burn.
For extended storage beyond three months, consider nitrogen flushing—a professional technique that replaces oxygen with inert nitrogen gas, dramatically slowing degradation.
Wrap individual portions in parchment paper before vacuum sealing to prevent compression damage.
Store at 0°F (-18°C) for maximum longevity.
When you’re ready to consume, thaw in your refrigerator for four hours, allowing the cheesecake layer to soften gradually while the brownie maintains its structure.
These methods grant you complete control over your dessert’s shelf life, ensuring premium quality whenever you choose to indulge.
Serving Suggestions and Variations
You can elevate your cheesecake brownies by experimenting with complementary toppings—consider a drizzle of dark chocolate ganache, a dusting of cocoa powder, or a dollop of crème fraîche to enhance the dessert’s visual appeal and flavor profile.
You’ll discover that classic variations include adding espresso powder to the brownie layer for depth, incorporating swirled fruit coulis through the cheesecake layer, or infusing the filling with liqueurs such as Kahlúa or Grand Marnier.
These strategic flavor combinations allow you to customize the dessert while maintaining its structural integrity and the balance between the dense brownie base and creamy cheesecake topping.
Serving Suggestions and Variations
How can you elevate your cheesecake brownie presentation? You’ve got freedom to customize your dessert experience with strategic choices.
- Serve at 65-70°F for ideal flavor complexity and texture contrast
- Pair with cold brew coffee or a robust Cabernet Sauvignon
- Top with torched Italian meringue or candied lemon zest
- Plate on chilled ceramics with micro herbs for visual sophistication
Adjust serving temperatures based on your preference—warmed brownie with chilled cheesecake layer creates dramatic sensory contrast.
Beverage pairings should complement rather than compete; select drinks with similar tasting notes to your filling components.
Experiment with dark chocolate ganache drizzles or sea salt crystallization. You’re not bound by convention—layer different textures, modify spice profiles, or introduce complementary spirits. The technical foundation remains solid; your creative execution determines the final impression.
Topping Ideas and Garnishes
Beyond the foundational layers, strategic garnishes transform your cheesecake brownie into a refined dessert worthy of upscale presentation.
Consider dusting cocoa powder across the surface using decorative stencils for geometric precision. Fresh edible flowers—pansies or violas—add sophistication and visual contrast against dark chocolate.
You’ll enhance textural complexity by incorporating candied citrus peel or toasted nuts in measured portions. A drizzle of white chocolate ganache creates sharp definition between elements. Metallic dust applications deliver contemporary elegance without compromising flavor profiles.
For minimalist aesthetics, a single chocolate curl or cocoa nib placement commands attention. You maintain creative autonomy while respecting the dessert’s architectural integrity.
Each garnish element should serve dual purposes: aesthetic impact and complementary taste integration. Strategic restraint prevents visual chaos and preserves the dessert’s refined character.
Flavor Combinations to Try
What makes a cheesecake brownie truly memorable isn’t just its construction—it’s the deliberate pairing of complementary flavor profiles that elevate each component.
You’ll discover that strategic flavor combinations transform your dessert from ordinary to extraordinary.
Consider these proven pairings:
- Salted Caramel – Layer a thin caramel drizzle between brownie and cheesecake layers, then top with fleur de sel for sophisticated contrast
- Raspberry Lemon – Swirl tart raspberry purée into the cheesecake layer with zest for bright, balanced complexity
- Espresso Dark Chocolate – Intensify your brownie base with quality espresso powder and 72% cacao for depth
- Matcha White Chocolate – Incorporate matcha into cheesecake with white chocolate shavings for refined earthiness
These combinations maintain structural integrity while delivering nuanced taste experiences.
Your freedom to experiment encourages personal refinement of ratios and intensity levels.
Frequently Asked Questions
Can I Make Cheesecake Brownies Ahead of Time for an Event?
You can absolutely prepare cheesecake brownies in advance. Store your baked creation at 40°F for up to three days, maintaining ideal texture and flavor integrity.
For transport, you’ll want to secure them in rigid containers with parchment separation to prevent shifting. Cut portions just before your serving timeline to preserve structural integrity.
This advance preparation strategy liberates you from last-minute kitchen demands while delivering professionally presented desserts that showcase your culinary precision.
What’s the Difference Between Cream Cheese and Mascarpone in This Recipe?
You’ll find significant flavor differences between cream cheese and mascarpone. Cream cheese delivers tanginess with sharp, acidic notes, while mascarpone offers subtle sweetness and richness.
Texture contrast matters equally—cream cheese provides dense, firm consistency ideal for structural integrity, whereas mascarpone yields creamy, luxurious softness.
Your brownie’s final result depends on which you choose. Cream cheese maintains definition; mascarpone creates indulgent decadence. Select based on your desired outcome and palate preferences.
How Do I Know When the Cheesecake Layer Is Fully Baked?
You’ll know your cheesecake layer’s done when you apply the toothpick test—insert it near the center and it should emerge clean or with minimal residue. Simultaneously, perform the jiggle test: gently shake the pan and observe a slight wobble in the center, not complete fluidity.
You’re targeting an internal temperature of 150°F. This precision guarantees you’re liberated from guesswork, yielding that perfectly set, creamy texture without overbaking’s dry consequences.
Can I Freeze Cheesecake Brownies, and for How Long?
You’ll want to freeze your cheesecake brownies up to three months for ideal results. Wrap them individually in parchment paper, then place them in airtight packaging materials to prevent freezer burn and quality loss. Store at 0°F or below.
Thaw at room temperature for approximately two hours before serving. This method preserves the distinct texture layers—crispy brownie base and creamy cheesecake topping—ensuring you maintain complete control over your dessert’s longevity and palatability.
What Causes Cracks in the Cheesecake Topping and How Do I Prevent Them?
You’ll prevent cracks by avoiding overbaking issues and temperature shock.
Don’t exceed 350°F—higher temps cause rapid moisture loss and surface splitting.
Allow your cheesecake layer to cool gradually at room temperature before refrigerating; sudden temperature changes create stress fractures.
Use precise measurements: room-temperature cream cheese binds properly without excessive shrinkage.
Cover your brownies loosely with foil during the final minutes if browning too quickly, maintaining structural integrity throughout baking.


Leave a Comment