Key Takeaways
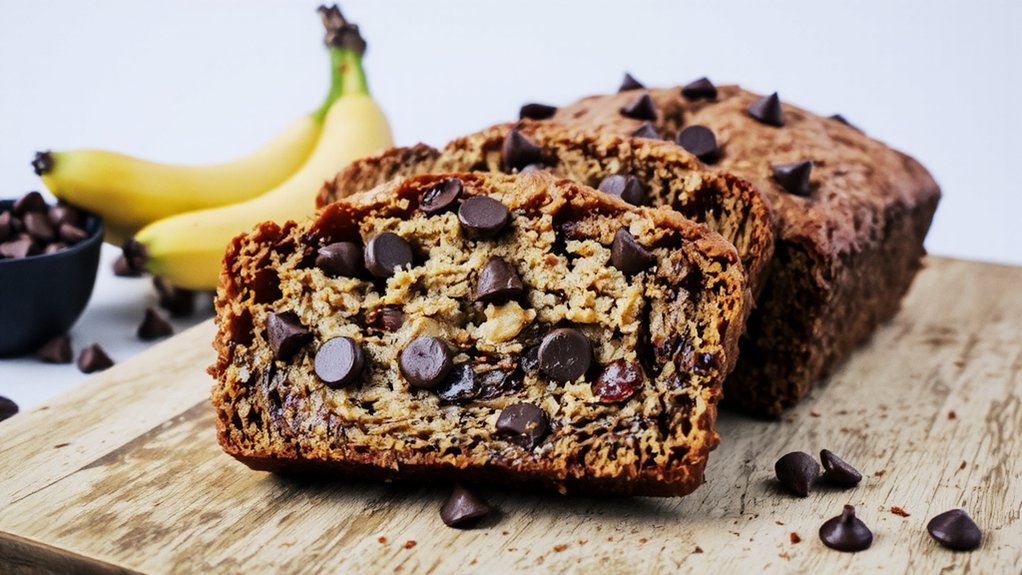
- Overripe bananas with dark brown speckles provide natural sweetness, deeper flavor, and easier mashing for superior banana bread texture.
- Mix creamed butter and sugar, add eggs individually, then alternate dry ingredients with mashed bananas, folding in chocolate chips last.
- Preheat oven to 350°F and bake for 50–65 minutes in a 9×5-inch metal loaf pan on the middle rack.
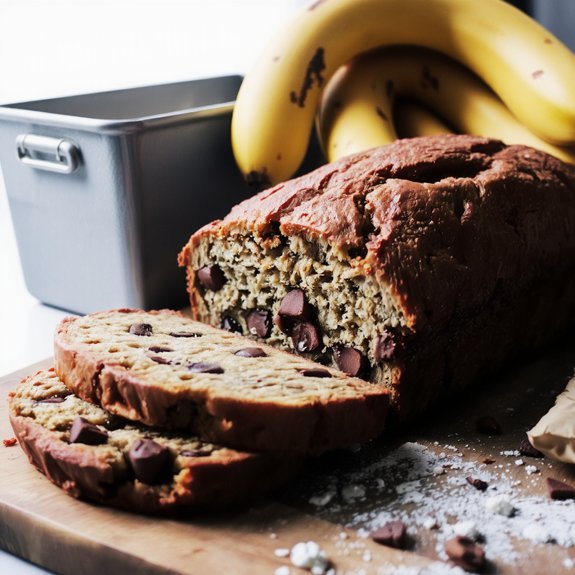
- Cool the loaf in the pan for 10 minutes, then transfer to a wire rack until completely cooled before wrapping.
- Store tightly wrapped at room temperature for three days or freeze whole loaves and slices for up to three months.
Why Overripe Bananas Are Perfect for Baking
When bananas develop dark brown speckles and soften considerably, they’ve reached their ideal state for baking.
You’re witnessing enzymatic sweetness at work—natural sugars intensifying as the fruit matures. This starch conversion transforms bland carbohydrates into complex sweetness, eliminating your need for excessive added sugar.
You’ll notice these overripe bananas yield more moisture and flavor than their yellow counterparts.
The breakdown of cell walls makes them easier to mash, creating smoother batters without extra effort. Their concentrated banana essence delivers authentic taste that underripe fruit simply can’t match.
You’re also gaining nutritional advantages.
The ripening process increases antioxidant levels and enhances digestibility. Rather than discarding softening bananas, you’re maximizing their potential. This intelligent ingredient choice gives you superior chocolate chip banana bread with deeper flavor and natural sweetness—making those dark-spotted bananas your baking secret weapon.
2. Gathering Your Ingredients
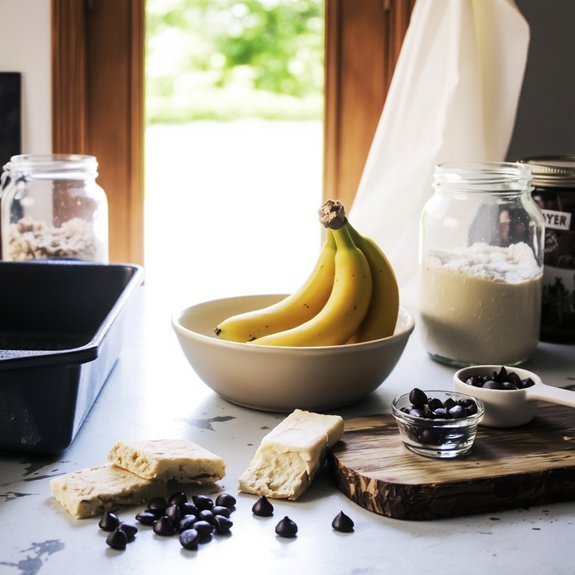
Assemble your dry and wet ingredients separately to streamline your mixing process and guarantee even distribution throughout the batter. You’ll need all-purpose flour, baking soda, salt, and cinnamon in one bowl. In another, combine melted butter, sugar, eggs, and vanilla extract.
Separate dry and wet ingredients for even distribution and streamlined mixing throughout your batter.
For budget shopping, purchase bananas at farmers’ markets during peak season when prices drop. Local sourcing provides fresher produce and supports your community.
Gather chocolate chips—choose quality brands that won’t compromise your bread’s texture. You’ll also need optional additions like walnuts or pecans if desired.
Having everything prepped before you begin eliminates scrambling mid-bake and prevents measurement errors. This organized approach gives you complete control over your baking success, helping each batch achieves that perfect moist crumb and rich chocolate distribution you’re after.
3. Essential Equipment and Tools
You’ll need a 9×5-inch loaf pan—preferably metal, which conducts heat more evenly than glass and produces superior crust development.
Grab a large mixing bowl for combining your wet ingredients and a separate one for dry components.
You’ll want sturdy measuring cups and spoons for accuracy, plus a whisk to incorporate air into your batter effectively.
Equip yourself with a rubber spatula for scraping bowl sides and ensuring complete mixing.
A stand mixer accelerates the process, though hand mixing works fine.
Don’t skip safety gear—use oven mitts to protect against burns when handling hot pans.
For maintenance tips, wash your loaf pan immediately after baking to prevent stuck-on residue.
Store all tools dry to prevent rust and degradation, maximizing their longevity and performance.
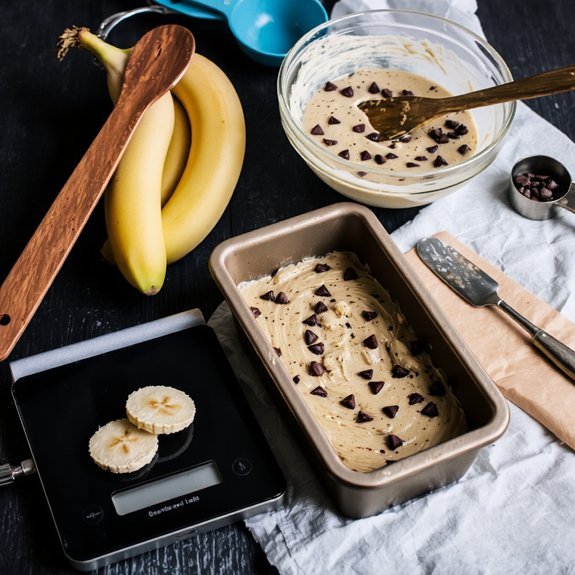
4. Preparing Your Batter
Now that you’ve gathered your equipment, it’s time to put those tools into action.
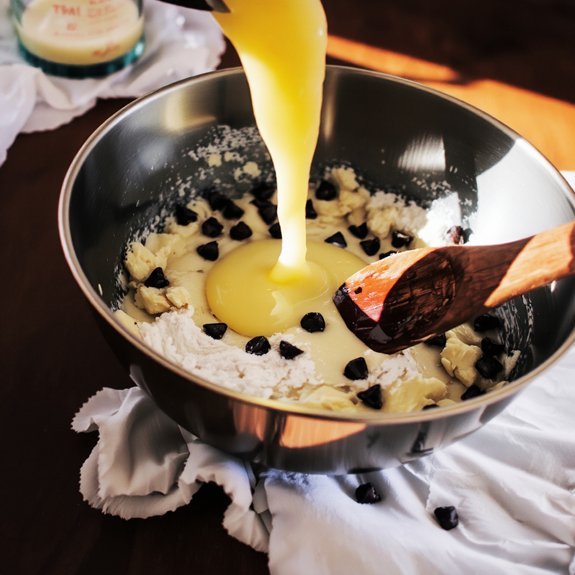
Start by creaming your softened butter and sugar until you’ve achieved a light, fluffy consistency—this typically takes two to three minutes. Add your eggs one at a time, making sure each incorporates fully before introducing the next.
In a separate bowl, whisk together your dry ingredients: flour, baking soda, and salt.
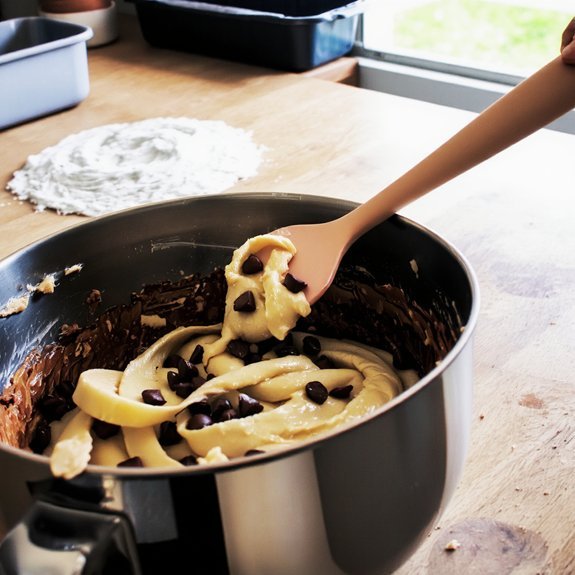
Alternate adding your dry mixture and mashed bananas to your wet ingredients, beginning and ending with the dry components. This technique prevents overmixing and ensures even distribution.
Fold in your chocolate chips last. Your resting batter should showcase specific texture indicators: a thick, uniform consistency with no visible streaks.
Let it rest for five minutes before pouring into your prepared pan. This brief resting period allows gluten to relax, guaranteeing ideal results.
5. Mixing Techniques for the Best Texture
Proper mixing technique determines whether your banana bread achieves that coveted tender crumb or becomes dense and gummy.
You’ll want to master aeration science—incorporating air into your batter creates lift and structure without relying on excessive leavening agents.
Start by creaming your butter and sugar together until light and fluffy, roughly two to three minutes.
This process traps air bubbles that’ll expand during baking.
When adding eggs, incorporate them one at a time, allowing each to fully integrate before proceeding.
For shear minimization, fold your dry ingredients gently using a spatula rather than aggressive mixing.
Overmixing develops gluten, creating toughness you’re trying to avoid.
Keep your strokes deliberate and minimal—you’re looking for just-combined ingredients, not a smooth, polished batter.
6. Baking Instructions and Timing
You’ll preheat your oven to 350°F and prepare a standard loaf pan with parchment paper or cooking spray to guarantee even heat distribution and easy removal.
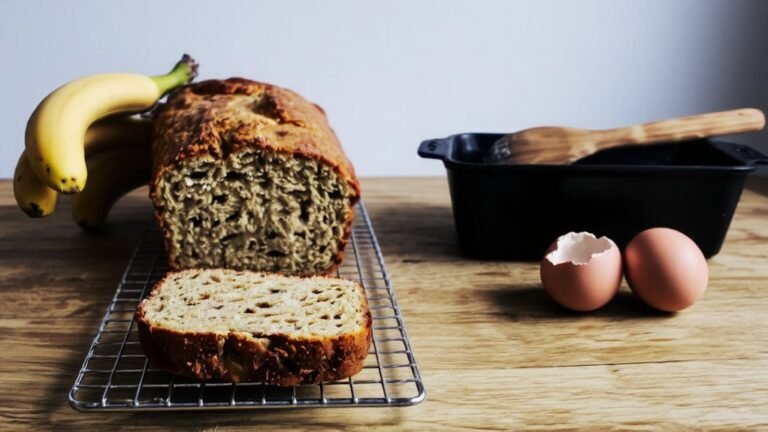
You’ll monitor your bread carefully between 55–65 minutes, using the toothpick test (inserting a pick into the center should yield a few moist crumbs, not wet batter) to determine doneness.
You’ll cool your loaf in the pan for 10 minutes before transferring it to a wire rack, then store it wrapped tightly at room temperature for up to three days or freeze it for extended freshness.
Oven Temperature and Preparation
Before your batter hits the oven, you’ll want to preheat it to 350°F (175°C)—a moderate temperature that allows the bread’s interior to bake through while the exterior develops a gentle, golden-brown crust without burning.
Give your oven 15-20 minutes for ideal preheat duration, ensuring consistent heat distribution throughout the baking chamber.
Position your loaf pan on the middle oven rack placement, which guarantees even heat circulation from above and below.
This strategic positioning prevents over-browning on top while allowing the bottom to cook thoroughly.
Consider these preparation essentials:
- Line your pan with parchment paper for easy removal and minimal cleanup
- Place a baking sheet on the lower rack to catch any drips
- Use an oven thermometer to verify actual temperature accuracy
Your setup’s precision directly impacts your bread’s success, so don’t skip these critical steps.
Baking Time and Doneness Tests
Once your pan settles into that preheated middle-rack position, the real transformation begins—typically within 50-65 minutes, though your specific oven’s temperament will dictate the exact timeline. You’ll notice the top developing a golden-brown crust while the crumb sets up inside.
| Sign | Indication |
|---|---|
| Slight jiggle at center | Still baking |
| Golden-brown top | Nearly done |
| Toothpick test clean | Fully baked |
| Residual heat carries through | Perfect doneness |
Deploy the toothpick test at the 50-minute mark—insert it into the thickest section. If it emerges dry or with just a few crumbs clinging, you’re locked in. Residual heat continues cooking the interior even after removal, so avoid overbaking. Let your loaf rest in the pan for 10 minutes before turning it out onto a wire rack, allowing carryover cooking to finish its work without drying out your creation.
Cooling and Storage Tips
The cooling phase proves just as critical as baking itself—your banana bread’s texture, moisture retention, and flavor development all hinge on this often-overlooked stage.
You’ll want to follow these essential steps:
- Rack cooling first: Transfer your loaf to a wire rack immediately after removing it from the oven, allowing air circulation underneath to prevent sogginess
- Airtight wrapping: Once completely cooled, wrap your banana bread tightly in plastic wrap or aluminum foil to lock in moisture
- Room temperature storage: Keep your wrapped loaf on the counter for up to three days, or freeze for extended preservation
This approach gives you maximum control over your bread’s final quality.
You’re preventing condensation buildup while maintaining that perfect crumb structure.
Don’t rush the cooling process—patience here directly impacts your results and guarantees you enjoy that ideal banana bread consistency every single time.
7. Cooling and Storage Tips
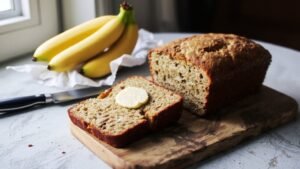
Allowing your banana bread to cool properly guarantees you’ll achieve the ideal texture and moisture retention for slicing.
You’ll want to let it rest in the pan for 10-15 minutes before transferring it to a wire rack, where air circulates freely around the loaf.
Once completely cooled, you’re free to store your bread in airtight containers at room temperature for up to three days.
This method locks in moisture while preventing staleness.
For extended storage, you can prepare freezer portions by wrapping individual slices or the entire loaf tightly in plastic wrap and aluminum foil.
Your frozen banana bread maintains peak quality for three months, giving you convenient access to homemade treats whenever you desire.
8. Variations and Add-Ins to Try
You can elevate your banana bread by incorporating nutty mix-ins like walnuts, pecans, or macadamia nuts, which add textural contrast and rich, earthy undertones to your crumb.
Beyond bananas, you’ll find that blending in berries, stone fruits, or shredded coconut creates complex flavor profiles while maintaining moisture and structural integrity.
Experimenting with warm spices—cinnamon, cardamom, nutmeg—or unexpected elements like espresso powder and vanilla bean transforms your standard loaf into a sophisticated variation that keeps your palate engaged.
Nutty Mix-In Options
Countless nuts can elevate your banana bread from standard to extraordinary, each bringing distinct flavor profiles and textural contrasts to every bite.
You’ll discover that toasted walnuts deliver earthy depth, while macadamias contribute buttery richness that melts seamlessly into your crumb structure.
Consider these standout options:
- Pecans: Impart subtle sweetness and create a naturally crispy texture that resists sogginess
- Almonds: Provide delicate nuttiness without overpowering chocolate chips or other mix-ins
- Hazelnuts: Offer sophisticated complexity that pairs exceptionally well with cocoa undertones
When sourcing ethically, you’ll support sustainable farming practices that honor both land and growers.
For allergy substitutions, seeds like sunflower or pumpkin deliver comparable crunch and nutritional benefits.
Toast your nuts beforehand—this intensifies their flavors and guarantees ideal texture throughout your finished loaf, giving you complete control over your baking results.
Fruit Combinations Beyond Banana
Why settle for a single-fruit loaf when layering complementary flavors transforms banana bread into something remarkably complex?
You’ll discover that seasonal pairings elevate your bake beyond ordinary. Fold in diced strawberries for spring brightness, or blend blueberries with lemon zest for summer tang.
Autumn calls for diced apples and cinnamon; winter invites dried cranberries and orange zest.
Textural contrasts matter equally. You can incorporate crispy freeze-dried berries alongside soft raisins, creating dynamic bite variations.
Try pairing mashed banana with tart raspberries and coconut flakes—the contrast heightens flavor perception while adding structural interest.
Don’t overthink it: choose two complementary fruits maximum. This restraint prevents flavor muddle, letting each element shine. Your freedom lies in experimentation—test combinations that intrigue your palate, then commit to what works.
Spice and Flavor Twists
Elevating banana bread beyond its humble foundation requires strategic spice layering that transforms each slice into a complex flavor experience.
You’ll discover that cardamom, nutmeg, and Ceylon cinnamon create depth that standard recipes lack.
Consider these powerful additions:
- Regional Inspirations: Draw from Caribbean allspice or Indian garam masala for unexpected complexity
- Espresso Powder: Amplifies chocolate notes without adding coffee flavor
- Beverage Pairings: Match your spice profile—chai-spiced bread pairs brilliantly with black tea, while cardamom varieties complement dark roasts
You’re not simply baking; you’re crafting a sophisticated dessert that demands respect.
Experiment with ginger, clove, and black pepper to reveal dimensions your standard loaf never achieved.
Your palate deserves this liberation from monotonous sweetness.
Frequently Asked Questions
Can I Use Frozen Bananas Instead of Fresh Overripe Ones for This Recipe?
You can absolutely use frozen bananas—they’ll deliver even more intense flavor concentration than fresh overripe ones.
Thaw them completely at room temperature or in your refrigerator overnight, then drain excess liquid that accumulates. This prevents your bread from becoming soggy.
The freezing process breaks down cell walls, releasing sugars and deepening banana flavor dramatically. You’ll get a richer, more decadent loaf that liberates you from depending on perfectly timed fresh fruit availability.
How Do I Know When the Banana Bread Is Completely Done Baking Inside?
You’ll know your bread’s done when you’ve got two foolproof methods at your disposal.
First, try the toothpick test—insert one into the center, and you’re golden if it emerges clean or with minimal crumbs. Second, check the internal temperature with a meat thermometer; you’re targeting 205-210°F. Don’t rely on appearance alone; that golden exterior can deceive you. These techniques guarantee your loaf bakes through completely.
What’s the Difference Between This Recipe and Regular Banana Bread Without Chocolate Chips?
You’re adding chocolate chips, which creates a delightful texture contrast against the soft crumb.
This addition bumps up your sweetness balance, so you’ll actually reduce sugar slightly to avoid an overly cloying loaf.
The chips melt slightly during baking, distributing cocoa richness throughout.
You’re effectively elevating standard banana bread with sophisticated flavor complexity.
The technical shift? Your batter’s moisture content remains identical, but those chips introduce pockets of decadence that transform an ordinary quick bread into something extraordinary.
Can I Make This Recipe Without Eggs for Dietary or Allergy Reasons?
You’ve got two solid options that’ll keep your banana bread rising beautifully.
A flax egg—one tablespoon ground flaxseed mixed with three tablespoons water—creates binding structure and moisture.
Alternatively, aquafaba swap delivers remarkable results; use three tablespoons per egg.
Both methods preserve the chocolate chip bread’s crumb texture while liberating you from conventional egg dependency.
You’re maintaining leavening power and structural integrity without compromise.
How Long Does Homemade Chocolate Chip Banana Bread Stay Fresh at Room Temperature?
You’ll find your homemade chocolate chip banana bread maintains peak freshness for 2-3 days at room temperature. To maximize shelf life and prevent staling, you’ve got options: wrap it tightly in plastic wrap or aluminum foil, storing it in an airtight container.
The bread’s natural moisture content and fat from chocolate chips slow deterioration. For extended preservation beyond this window, you’re free to freeze it for up to three months without compromising quality.


Leave a Comment