
Key Takeaways
- Gather essential ingredients (flour, sugar, eggs, butter, baking powder, baking soda, salt, vanilla) and measure accurately using a kitchen scale.
- Prepare your workspace by clearing countertops, arranging measured ingredients in order, positioning equipment within reach, and preheating your oven.
- Mix dry ingredients, create a well, pour wet ingredients into center, and fold gently until just combined to avoid overmixing.
- Bake at the correct temperature, monitor time, and test doneness with a toothpick that emerges with a few moist crumbs.
- Cool in pan for 10–15 minutes, invert onto a cooling rack, allow complete cooling before frosting to prevent melting and preserve structure.
Essential Ingredients and Equipment

Before you’ll succeed in baking a cake, you’ll need to gather specific ingredients and tools that directly impact your results.
Stock your pantry with flour, sugar, eggs, butter, baking powder, baking soda, salt, and vanilla extract. You’ll also need milk and potentially cocoa powder or food coloring depending on your recipe.
Your equipment list must include mixing bowls, measuring cups and spoons, an electric mixer, cake pans, a whisk, and an oven thermometer.
Quality matters here—accurate measurements guarantee consistent outcomes.
Implement proper storage techniques by keeping dry ingredients in airtight containers away from moisture and heat.
Follow safety standards by reading ingredient labels for allergens and checking expiration dates before use.
These fundamentals establish your foundation for baking success.
Preparing Your Ingredients and Workspace

You’ll gather your baking essentials—flour, sugar, eggs, butter, leavening agents, and vanilla—and verify that each ingredient meets your recipe’s specifications before you begin.
Organize your kitchen workspace by arranging measured ingredients in the order you’ll use them, positioning your equipment within arm’s reach, and clearing counter space for mixing and preparation.
Measure each ingredient using the appropriate tool—dry ingredients with measuring cups or a scale, liquids with liquid measuring cups—to guarantee accuracy and consistent results.
Gathering Your Baking Essentials
Successful baking hinges on precise measurements and an organized workspace.
You’ll want to establish your freedom to bake without interruptions or scrambling for supplies.
Start with budget shopping by purchasing quality essentials:
- Dry ingredients—flour, sugar, baking powder, and salt
- Wet ingredients—eggs, milk, butter, and vanilla extract
- Equipment—mixing bowls, measuring cups, whisk, and cake pans
Before you begin, run through a quick safety checklist.
Clear your countertop completely, ensuring you’ve got adequate space for mixing and prep work.
Verify your oven functions properly and preheats accurately.
Gather every ingredient and tool within arm’s reach—this prevents mid-bake scrambling.
You’re now ready to execute your baking plan with confidence and precision.
Organizing Your Kitchen Space
Arranging your ingredients and workspace strategically streamlines your baking process and minimizes errors.
You’ll want to establish a decluttering schedule before you start, removing unnecessary items from your countertop to create unobstructed work zones.
Organize your dry ingredients—flour, sugar, baking powder—in clearly labeled containers within arm’s reach.
Use vertical storage on shelves or wall-mounted racks to maximize your available space without cluttering work surfaces.
Position your mixing bowls, measuring tools, and utensils in designated spots you can access without searching.
Keep your oven preheated according to recipe specifications, and arrange all wet ingredients—eggs, butter, milk—in logical order.
This methodical setup lets you work efficiently without interruption, giving you complete control over your baking project from start to finish.
Measuring Ingredients Accurately
Once your workspace is organized, accurate measurements become your foundation for consistent results.
You’ll need precision to prevent error propagation throughout your batter, which compounds mistakes into failed batches.
Master these measurement techniques:
- Use a kitchen scale for dry ingredients—grams provide superior accuracy over volume measurements, which vary by density and packing.
- Measure liquids in graduated cylinders at eye level to eliminate parallax errors that skew proportions.
- Level dry ingredients with a straight edge; avoid scooping directly from containers, which compacts flour and increases weight.
Understanding measurement history reveals why baking demands exactness: it’s chemistry, not art.
Your freedom to create exceptional cakes depends on respecting these boundaries.
Invest in reliable tools—digital scales, proper measuring cups, and spoons—to eliminate guesswork.
Consistency builds confidence and reproducible success every time you bake.
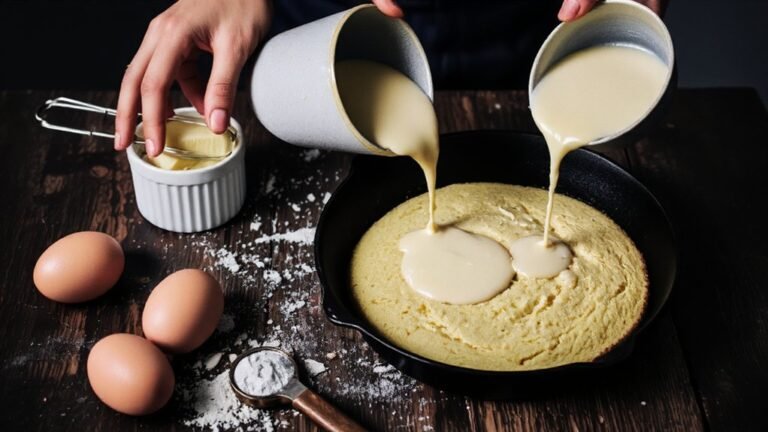
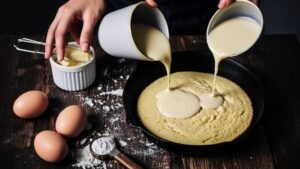
Mixing Your Cake Batter

Combining your dry and wet ingredients requires attention to technique and timing. You’ll want to fold your batter methodically, using a mixing speed that prevents overmixing effects like tough, dense crumbs. Start by creating a well in your dry mixture, then pour your wet ingredients into the center. Gently stir until just combined—streaks of flour are acceptable here.
| Mixing Method | Ideal Speed | Result |
|---|---|---|
| Hand folding | Slow, deliberate | Tender crumb |
| Electric mixer | Medium | Even distribution |
| Overmixing | Excessive | Dense, tough texture |
Don’t break free from restraint. Overworked batter develops gluten excessively, compromising your cake’s delicate structure. Stop mixing the moment you see no dry flour. Your batter should look slightly lumpy, not perfectly smooth. This discipline guarantees the tender, moist cake you’re after—one that respects both technique and ingredient quality.
Baking and Testing for Doneness
Now that your batter’s properly prepared—with restraint applied and structure preserved—you’ll transfer it to your preheated oven where heat transforms these ingredients into cake.
Monitor your bake time closely, as every oven varies. You’re looking for specific indicators of doneness:
- The cake’s exterior should turn golden brown while the crumb elasticity develops internally through protein and starch gelatinization.
- Use the toothpick test: insert it into the center—it should emerge with a few moist crumbs, not wet batter.
- Press the cake’s surface lightly; it’ll spring back immediately when properly baked.
Remove your cake when these conditions align. Don’t overbake—you’ll sacrifice moisture and create a dry crumb structure.
Let it cool in the pan briefly before turning it out. Precision here determines your final product’s quality.
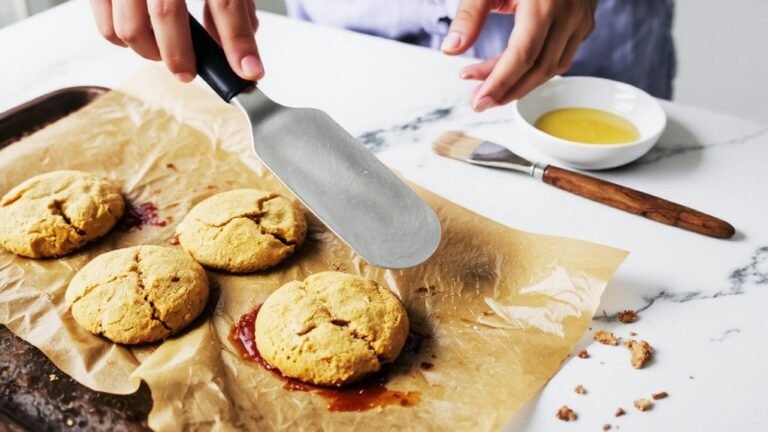
Cooling and Removing Your Cake
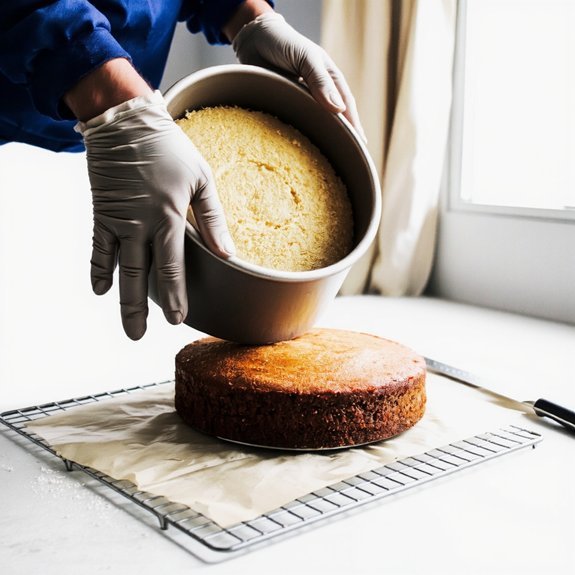
Letting your cake cool properly prevents structural collapse and guarantees clean removal from the pan.
You’ll want to cool your cake in the pan for ten to fifteen minutes—this allows the crumb structure to set while maintaining enough residual heat for easy release.
Run a thin knife around the pan’s perimeter, breaking the seal between cake and edge.
For the inversion technique, place your cooling rack atop the pan, then flip both together in one confident motion.
The cake should release cleanly.
If you’re performing gentle unmolding, support the cake’s underside with your hand as you carefully lift the pan away.
Let the cake cool completely on the rack before frosting or stacking.
This prevents frosting from melting and safeguards structural integrity for assembly.
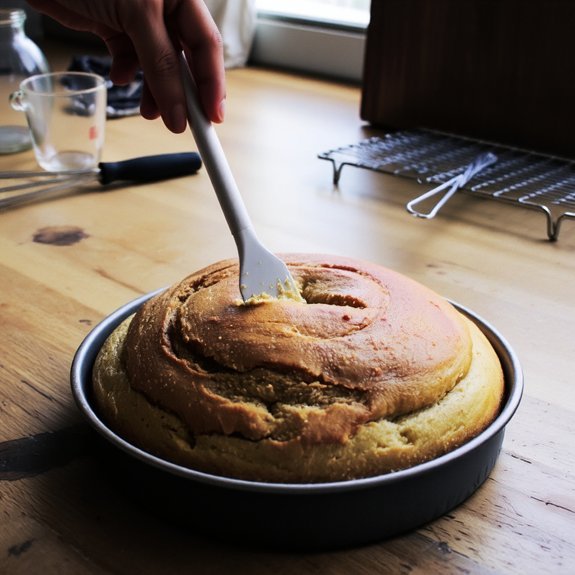
Frosting and Decorating Your Creation
Achieving a professional finish requires selecting the right frosting consistency and application technique.
You’ll want to master buttercream techniques to achieve smooth, even coverage across your cake’s surface.
- Prepare your buttercream by beating softened butter with powdered sugar until you reach a spreadable consistency—too thick and you’ll tear the cake, too thin and it’ll slide off.
- Use an offset spatula for base coating, applying a thin crumb layer first, then chilling before your final coat.
- Execute piping patterns with a fitted pastry bag and appropriate tips—star tips for borders, round tips for dots, and leaf tips for foliage details.
These buttercream techniques and piping patterns transform your baked creation into a polished, visually striking dessert that reflects your baking mastery.
Frequently Asked Questions
Can I Substitute Ingredients Like Eggs or Dairy in Cake Recipes for Dietary Restrictions?
You can absolutely modify cake recipes to suit dietary restrictions. For eggs, you’ll substitute with applesauce, flax eggs, or commercial replacers.
Dairy swaps include plant-based milk and vegan butter. Nut free alternatives work for nut-based flours—use all-purpose flour.
Vegan swaps like aquafaba replace both eggs and dairy effectively. You’re controlling your ingredients’ composition, maintaining structural integrity and moisture balance throughout your baking process.
How Do I Prevent My Cake From Sinking in the Middle During Baking?
You’ll prevent cake sinking by mastering proper mixing—don’t overmix your batter, which incorporates excess air that collapses during baking.
Verify your oven temperature’s accuracy with a thermometer; baking at incorrect temperatures causes uneven rising and center collapse.
Use room-temperature ingredients for consistent incorporation.
Fill your pan only two-thirds full, allowing adequate rise room.
Bake until a toothpick emerges with minimal crumbs—underbaking guarantees sinking.
You’ve got this; precision yields freedom from baking failures.
What Should I Do if I Don’t Have the Exact Pan Size a Recipe Calls For?
You’ll need to master pan conversions to adjust recipes independently.
Calculate your pan’s volume and match it to the recipe’s specifications.
Make depth adjustments accordingly—shallower pans require reduced baking time, while deeper ones need more.
Modify ingredient quantities proportionally if you’re substantially changing pan size.
Adjust oven temperature slightly for unconventional depths.
You’re free to experiment once you understand these technical relationships between volume, depth, and baking parameters.
How Far in Advance Can I Bake a Cake Before Frosting and Serving It?
You can bake your cake up to three days ahead when you’re using proper refrigeration timing.
Store it covered at 4°C to maintain moisture and structure.
For extended storage, freezing timelines allow you to preserve unfrosted cakes for up to three months at -18°C.
Wrap layers individually in plastic wrap, then foil.
This method lets you control your baking schedule freely, frosting on your own timeline without compromising ingredient integrity or texture quality.
Why Did My Cake Turn Out Dry, and How Can I Fix It Next Time?
Your cake’s dryness likely stems from overmixed batter, which develops excessive gluten, or an oven temperature that’s too high, causing rapid moisture evaporation.
You’ll fix this by mixing ingredients until just combined and verifying your oven’s actual temperature with an independent thermometer.
Next time, add an extra egg yolk for richness, reduce baking time by five minutes, and insert a toothpick to check doneness early.


Leave a Comment