Key Takeaways
- Start with equal parts flour and water; feed daily until doubling within eight hours indicates readiness for baking.
- Mix flour and water, rest 30 minutes, incorporate active starter, add salt, then perform stretch-and-fold every 30 minutes for two hours.
- Bulk ferment 4–6 hours at room temperature until dough increases 50–75% volume with visible bubbles beneath surface.
- Shape dough, transfer seam-side up to banneton, and cold proof in refrigerator 12–48 hours for flavor and scoring definition.
- Score at 45-degree angle, bake covered 20 minutes at 500°F, then uncovered 25–30 minutes at 475°F until internal temperature reaches 210°F.
Building Your Sourdough Starter From Scratch
Before you can bake authentic sourdough, you’ll need to cultivate a living culture of wild yeast and lactic acid bacteria.
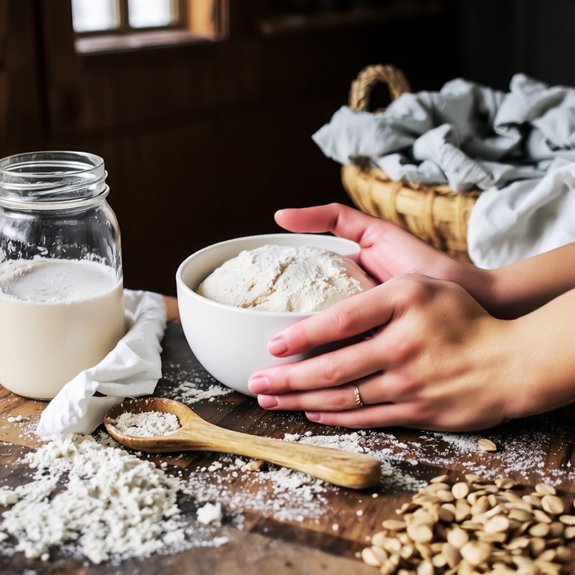
Combine equal parts unbleached flour and filtered water—start with 50 grams each—in a clean jar.
Combine equal parts unbleached flour and filtered water—start with 50 grams each—in a clean jar.
Feed your starter daily, discarding half and adding fresh flour and water.
By day five or six, you’ll notice consistent bubbling and a distinctive tangy aroma, signaling active fermentation.
Once established, you’re free to customize your starter naming—whether you choose something playful or traditional.
Your starter becomes a valuable asset worth preserving.
Consider starter gifting to fellow bakers; you’re sharing not just flour and bacteria, but a living legacy.
Store your mature starter at room temperature for regular baking, or refrigerate between uses to extend feeding intervals.
Understanding Fermentation and Natural Yeast
You’ll cultivate wild yeast by mixing flour and water in consistent ratios, feeding your starter daily or weekly depending on your desired activity level and kitchen temperature.
Your starter’s fermentation process relies on Saccharomyces cerevisiae and Lactobacillus bacteria naturally present in flour, which you’ll maintain through regular feedings that keep the microbial population active and vigorous.
You’ll monitor your starter’s doubling time, rise patterns, and aromatic profile—sour smell indicates lactic acid development—to determine when it’s ready for baking.
Wild Yeast Cultivation Process
Cultivating wild yeast requires combining equal parts flour and water—typically 50 grams each—in a clean glass jar to create your starter culture.
You’ll rely on natural air sampling to introduce wild microorganisms into your mixture.
Daily feedings of equal parts flour and water sustain microbial populations, establishing selective media conditions that favor beneficial yeast strains over unwanted bacteria.
You’ll notice visible activity within three to five days: bubbling, rising, and a distinctive sour aroma indicate successful fermentation.
Temperature fluctuations between 68–75°F optimize yeast activity.
Maintain consistency with once-daily feedings until your starter reliably doubles within eight hours of feeding.
This living culture becomes your leavening agent, giving you complete control over your bread’s fermentation timeline and flavor development without commercial additives or constraints.
Starter Maintenance and Activity
How do you keep your wild yeast culture thriving once it’s established?
You’ll maintain starter resilience through consistent feeding schedules—typically twice daily with equal parts flour, water, and starter.
Use filtered water and unbleached flour to eliminate variables that compromise fermentation.
Monitor aroma profiling to gauge activity levels.
A mature starter produces fruity, tangy, or slightly alcoholic scents indicating robust microbial populations.
You’ll notice peak rise times between feedings—usually 4-8 hours depending on temperature.
Store your starter at room temperature for regular baking, or refrigerate between uses to slow fermentation.
When refrigerated, feed weekly to maintain viability.
Before baking, bring your starter to room temperature and feed it 4-6 hours prior, ensuring peak activity and reliable rise in your dough.
Essential Equipment and Ingredients
Making exceptional sourdough requires just a handful of specialized tools and straightforward ingredients. You’ll need:
Making exceptional sourdough requires just a handful of specialized tools and straightforward ingredients, nothing more.
- A kitchen scale for precise measurements—accuracy determines your bread’s success
- Mixing bowls (preferably ceramic or glass) for bulk fermentation without reactivity
- Dutch oven for steam retention during baking, creating that coveted crust
You’ll gather bread flour, water, salt, and your active sourdough starter. That’s it. No commercial yeast. No additives.
Your starter should be fed and bubbly before mixing. Use filtered or dechlorinated water—chlorine inhibits fermentation.
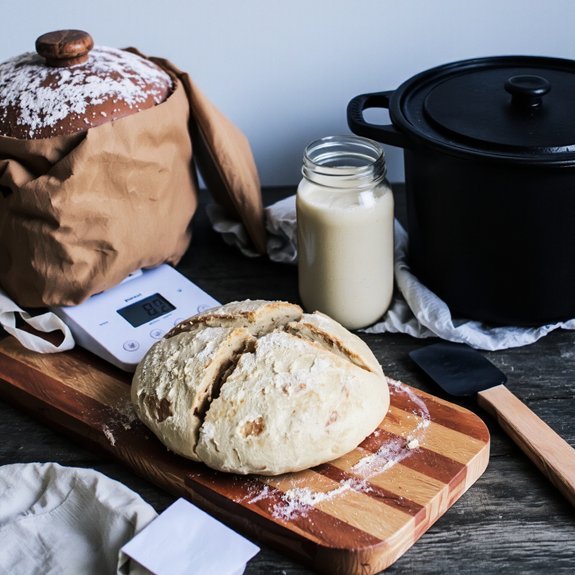
A banneton basket helps, though you can substitute a floured bowl. A bench scraper aids shaping. A thermometer lets you monitor dough temperature, ensuring consistent results.
These essentials give you complete control over your baking process, liberating you from commercial bread’s constraints.
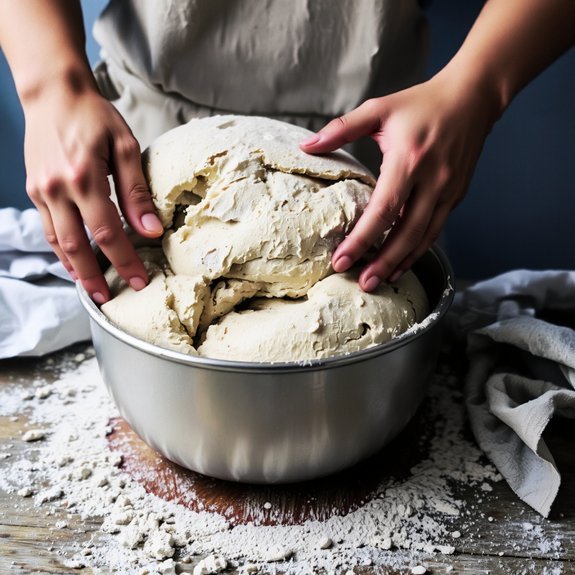
Creating the Perfect Dough

With your equipment ready and ingredients assembled, you’ll now combine them into a cohesive dough that’ll develop flavor and structure over time. Start by mixing your flour and water, then let them rest for thirty minutes—this autolyse benefits gluten development without requiring mechanical effort.
Next, incorporate your active sourdough starter, fully integrating it before adding salt. Salt timing matters notably; introduce it after the initial incorporation phase to prevent inhibiting fermentation while strengthening your dough’s structure.
Use the stretch-and-fold method every thirty minutes for the first two hours, building tension without aggressive kneading. You’re creating extensibility and strength simultaneously, allowing your dough to trap gas efficiently.
This hands-on approach gives you complete control over fermentation speed and final texture, delivering the artisan quality you’re after.
The Art of Bulk Fermentation
You’ll find that temperature control matters greatly during bulk fermentation, as warmer environments (75-78°F) accelerate fermentation while cooler conditions (68-72°F) slow it down and develop more complex flavors.
Your fermentation time typically ranges from 4-6 hours at room temperature, though you should watch for a 50-75% volume increase and visible bubbling rather than relying solely on the clock.
Adjust your timing based on your kitchen’s actual temperature and your starter’s strength to achieve the ideal balance between gluten development and flavor maturation.
Temperature Control Matters
During bulk fermentation, temperature directly controls the rate at which your sourdough starter‘s wild yeast and lactic acid bacteria metabolize, ferment your dough, and develop flavor compounds.
You’ll master fermentation by managing these critical factors:
- Ambient temperature: Maintain 75-78°F for ideal activity; cooler conditions slow fermentation, warmer temperatures accelerate it
- Kitchen insulation: Assess your environment’s thermal stability to predict fermentation timelines and adjust accordingly
- Seasonal adjustments: Summer requires shorter bulk windows; winter demands extended fermentation periods or warming strategies
You’re not bound by rigid schedules. Take control by understanding your specific conditions.
Use a reliable thermometer and track fermentation progress visually—poke tests reveal readiness better than clocks.
Cold-retard overnight for flexibility, or bulk at room temperature for predictable results. Your freedom lies in informed decision-making, not following arbitrary timeframes. Temperature mastery transforms inconsistent batches into reproducible excellence.
Fermentation Time Guidelines
Now that you’ve grasped how temperature shapes fermentation speed, timing becomes your next lever for controlling dough development. You’ll master bulk fermentation by establishing clear timing benchmarks tailored to your conditions.
| Temperature | Bulk Time | Signs of Readiness |
|---|---|---|
| 68–70°F | 8–12 hours | 50–75% volume increase |
| 72–75°F | 5–8 hours | Visible bubbles throughout |
| 76–80°F | 3–5 hours | Dough jiggles, holds shape |
Seasonal adjustments demand your attention. Summer heat accelerates fermentation substantially; you’ll reduce timing by 2–3 hours. Winter cold requires patience—extend fermentation by 4–6 hours. Don’t rely solely on clocks. You’re free to trust your dough’s visual cues: proper windowpaning, jiggly texture, and risen volume matter more than rigid schedules. This flexibility transforms you from follower to baker.
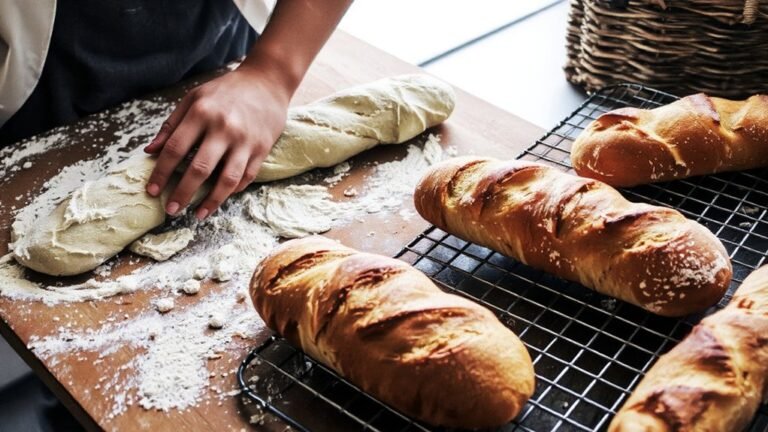
Shaping and Cold Proofing Your Loaf
After your dough’s bulk fermentation is complete—when it’s increased by 50–75% and shows visible bubbles beneath the surface— gently turn it onto a lightly floured work surface.
Pre-shape it into a round by folding the edges toward the center and rotating the dough to build surface tension.
Now you’ll execute your final shaping. Here’s your approach:
- Flip the dough seam-side down and tension the surface by pulling it toward you
- Fold the top third down, seal with heel pressure, then repeat from the sides
- Roll it away, creating edge tension while pinching the seam closed
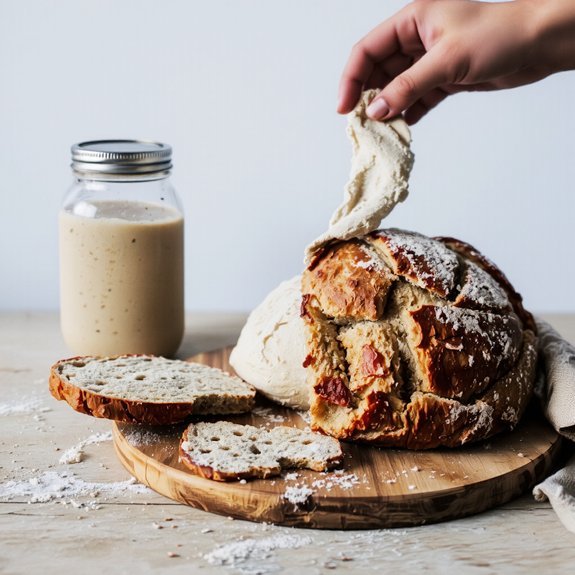
Transfer your shaped loaf seam-side up into a banneton.
Cover it and refrigerate for 12–48 hours.
This cold proofing develops complex flavor, improves scoring definition, and gives you scheduling flexibility.
You’ve earned control over your baking timeline.
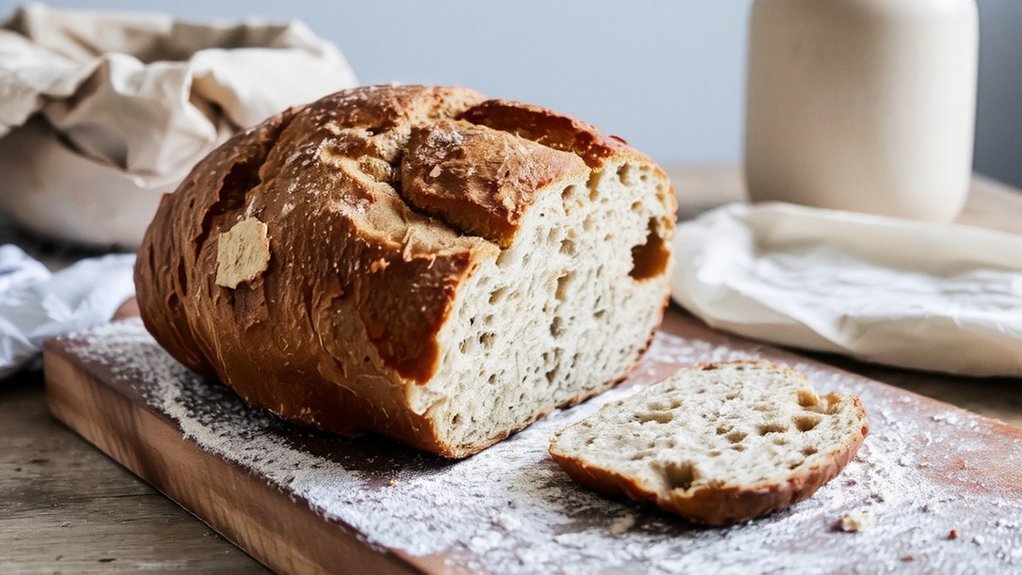
Scoring and Baking Techniques
Your cold-proofed loaf’s success depends on two critical final steps: scoring and precise oven management.
You’ll want to use a sharp blade at a 45-degree angle, creating deliberate slashes that control expansion.
Consider your pattern symbolism—traditional crosshatches promote even rise, while angle variation in diagonal cuts encourages distinctive ear development.
Score decisively with confidence; hesitant cuts won’t open properly.
Preheat your Dutch oven to 500°F for 45 minutes.
Transfer your loaf onto parchment, score immediately, then bake covered at 500°F for 20 minutes.
This traps steam, creating that coveted crust.
Remove the lid, reduce heat to 475°F, and bake 25-30 minutes until deep golden-brown.
Your loaf’s internal temperature should reach 210°F.
You’ve earned this moment of mastery.
Troubleshooting Common Sourdough Problems
Even with perfect technique through scoring and baking, results don’t always match expectations—and that’s where systematic problem-solving becomes invaluable.
You’ll encounter recurring issues that demand targeted solutions:
- Dense crumb structure stems from insufficient fermentation time or weak gluten development—extend bulk fermentation by 2-4 hours and strengthen your stretch-and-fold routine.
- Gummy interior indicates underbaking; increase oven time by 10-15 minutes or lower hydration by 2-3% for your next batch.
- Flat loaves result from overproofing—reduce final proof duration and monitor your dough’s rise carefully.
Master storage techniques by keeping your loaf in breathable linen bags, never plastic.
Consider allergen alternatives like spelt or einkorn flour for dietary needs.
Document each bake’s variables—temperature, fermentation duration, hydration ratio—to identify patterns and refine your process systematically.
Frequently Asked Questions
How Long Does Artisan Sourdough Bread Stay Fresh After Baking?
You’ll keep your artisan sourdough fresh for 2-3 days at room temperature before staling chemistry noticeably increases crumb firmness.
Store it cut-side down on a breadboard, unwrapped—this lets you control moisture loss independently.
You’re not enslaved to plastic bags that trap steam and accelerate degradation.
Day four, you’ll notice structural changes.
Freeze extras immediately after cooling to preserve that perfect crumb structure you’ve worked hard to develop.
Can I Freeze Sourdough Dough, and How Do I Thaw It Properly?
You can absolutely freeze sourdough dough for ideal freezing results.
After bulk fermentation, you’ll shape your dough, wrap it tightly in plastic wrap, and freeze it up to three weeks.
For thawing methods, transfer your dough to the refrigerator overnight—this slow thaw preserves your starter’s integrity and develops complex flavors.
Alternatively, you’ll room-temperature thaw for four to six hours before final proofing and baking.
What’s the Best Way to Store Finished Sourdough Bread?
You’ll want to store your finished sourdough in a paper bag at room temperature for up to three days—this lets it breathe while maintaining that crispy crust.
For longer storage, use a bread box, which prevents excessive moisture loss without trapping steam.
You’ve got the freedom to slice it whenever you want.
Avoid plastic bags; they’ll trap condensation and soften that hard-earned crust you’ve worked to develop.
How Do I Convert My Sourdough Starter to Whole Wheat Flour?
You’ll gradually shift your starter by replacing white flour with whole wheat flour over several feedings. Begin by substituting 25% whole wheat flour, then incrementally increase to 50%, then 100% across 7-10 days.
You’ll need hydration adjustments since whole wheat absorbs more water—increase liquid by 5-10%.
This slower conversion maximizes flavor development, prevents fermentation issues, and lets beneficial bacteria adapt to the denser grain structure.
Can I Use Sourdough Starter From Someone Else to Bake?
You can absolutely use someone else’s sourdough starter.
Before you proceed, you’ll want to verify starter hygiene—ask about their feeding practices and storage conditions.
Expect flavor variability since different starters develop unique microbial profiles based on their environment and maintenance.
Feed it several times in your own kitchen to acclimate it to your local conditions.
This adaptation period guarantees you’ll achieve consistent, reliable results for your baking.


Leave a Comment